Showing posts with label homemade. Show all posts

Sunday, June 23, 2013

Recipe: Goat Cheese Crackers

homemade, crackers, gluten free, snacks, diy, goat cheese, seattle, recipe, baking

Ingredients:
½ cup corn flour
½ tsp salt
¼ tsp sage
4 oz. soft goat cheese
½  to 1 cup ice water
 cup olive oil

Directions:

Preheat your oven to 350ºF
1. Combine corn flour, salt and sage in a medium mixing bowl. 

2. Add goat cheese. Use a fork to break it up.
homemade, crackers, gluten free, snacks, diy, goat cheese, seattle, recipe, baking


3. The next part is easier with your hands: as you mix in the goat cheese, sprinkle a couple teaspoons of ice water on the mix. 

4. Now, drizzle some olive oil on everything. Alternate between ice water and oil till the dough stops falling apart when you try to press it flat.

5. Roll the dough into a ball and place to one side of a large piece of wax paper. Fold the other half of the wax paper over the ball of dough and gently press to flatten a bit.

6. Use a rolling pin to roll the dough out to a little more than a ¼ inch thick. (Your dough will have a few cracks around the edges, but if it cracks a lot or falls apart, put it back in the bowl and mix in a little more water or oil.)


7. Use a cookie cutter to cut your crackers. Line them neatly on a cookie sheet and use a fork to make divots in the centers.
homemade, crackers, gluten free, snacks, diy, goat cheese, seattle, recipe, baking


8. Bake 15-20 minutes, or until the edges turn a nice golden brown.
homemade, crackers, gluten free, snacks, diy, goat cheese, seattle, recipe, baking

Saturday, March 2, 2013

Recipe: Poor Girl's Latte

recipe, latte, how to, save money
Somewhere in the back of my mind, I always knew I could make foamy milk for lattes at home, but I was still surprised by how easy it was! I was heating up milk for my coffee when I grabbed my flat whisk and thought "I wonder..." Sure enough, the hot milk foamed up like magic and I had myself a poor girl's latte!

I was a barrista for 2 1/2 years, and let me just say, I am able to make better foam with this technique than I ever made with a professional steamer! (I kinda sucked at my job)

Ok, let's make a latte!

Ingredients:
½ cup milk
hot coffee
sugar, to taste

Tools:
Coffee filter & cone
A small sauce pan
small whisk, preferably flat

Directions:
1. Make your coffee.  Make a little less then a full cup, so you'll have room for the foam. You want strong coffee for this, so poor it through the coffee filter twice (that's the "poor girl" part, haha).

2. Put the milk in the sauce pan and heat it over low-medium heat.

3. Watch your milk carefully. It can burn easily! After about 3-5 minutes test the temperature with your finger. It should be nice and warm.

4. Start whisking! It should start foaming up immediately. If it doesn't, let it heat a little longer.
lattes on a budget!Simple directions for making your own lattes

5. Poor the foamed milk into your coffee. Enjoy!

Simple directions for making your own lattes

Monday, January 7, 2013

DIY: Easy picture hanging

ampersand, decor, DIY, bedroom, how-to, picture, hanging, lifestyle, fleur d'elise

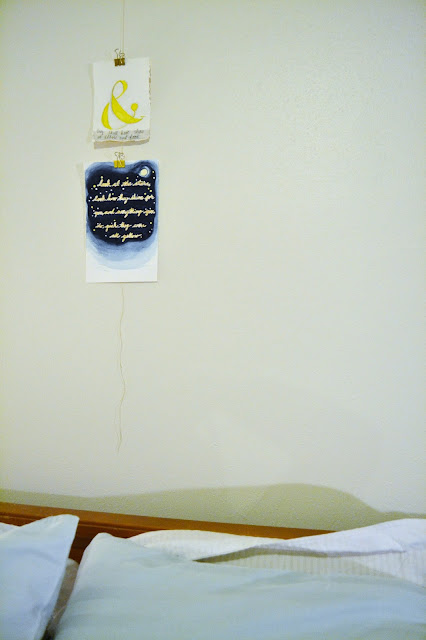
I am so bad with home projects, especially, when they involve tools. Mainly, I just don't have the patience, which I guess is kind of how I came up with this picture hanging technique. It doesn't require many materials, and you won't need any tools except for scissors.

ampersand, decor, DIY, bedroom, how-to, picture, hanging
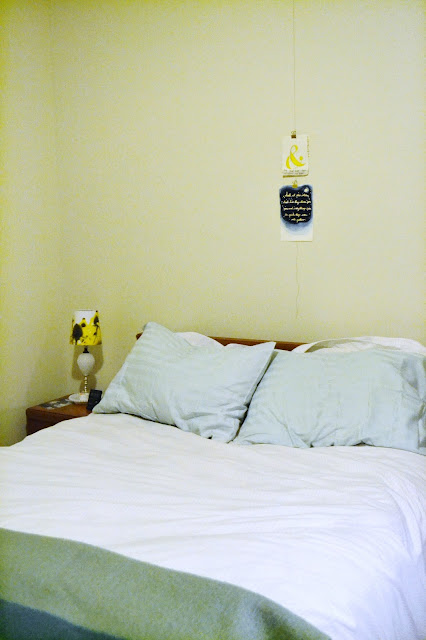
 Another huge plus is that it doesn't involve anything heavy. The most dangerous thing is the thumbtack, so in the event of an earthquake (they're always a risk here in Seattle), the people sleeping under it won't have their heads smashed.

You will need:

1 thumbtack
1 spool of string
Small bulldog or binder clips
Art, photos, or postcards
Scissors


How-to:
1. Hold one end of your string to the ceiling and unspool until just about your headboard (or wherever you want it to end). Cut with scissors.

2. Firmly press your thumbtack into the wall, just before it meets the ceiling. Don't stick it in the ceiling. You'll find it's pretty hard to hang things from it.

3. Tie a small loop in one end of the string. Hang on thumbtack.

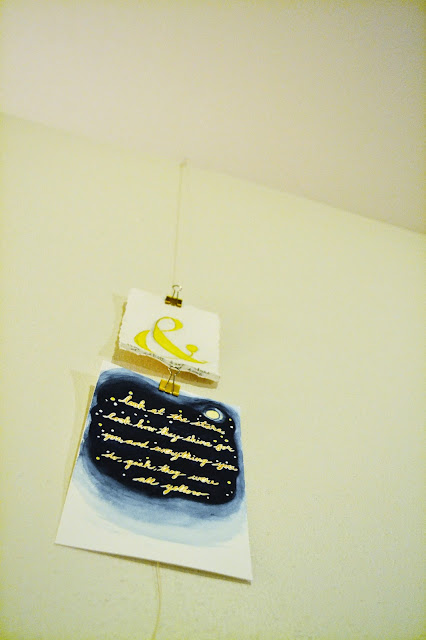
4. This next step takes a bit of concentration. Thread a clip onto your string and slide up to about the place you want it to hang. Thread the string back through again, so it's double wrapped, and tie a not to secure. 

5. Clip your first picture. This will help you decide where you want the second clip to hang.

ampersand, decor, DIY, bedroom, how-to, picture, hanging
6. Repeat Step 4. I wouldn't suggest hanging more than three pictures, as it might get to heavy for the tack to hold.
ampersand, decor, DIY, bedroom, how-to, picture, hanging, lifestyle, fleur d'elise

P.S. If you're wondering what the cards say, the top one has a line from a Dylan Thomas poem and the bottom card is lyrics from "Yellow" by Coldplay.

Saturday, December 29, 2012

Recipe: Mona Kay Cocktail

Cocktail, recipe, nye, new years eve, bitters, DIY, homemade, grapefruit
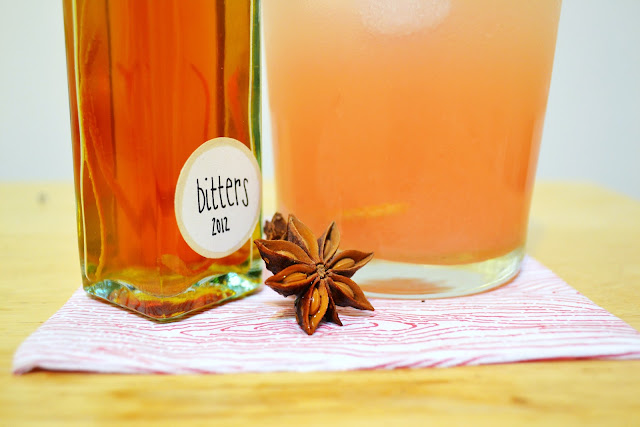
My experiments with homemade bitters have met with success. How do I know? Well, they're delicious. So delicious that I'm having trouble writing this. Hashtag buzzed.

I decided to try out a version of the recipe I saw in Martha Stewart's Whole Living. I used tangerine and grapefruit peel in place of the orange and lemon zest. My spice mix varied just a little, too.


To make sure my version turned out okay, I developed The Mona Kay. Why the name? While browsing old city documents, I discovered that my apartment building was christened The Mona Kay upon it's construction in the early 1940's. Since the drink and the building are a similar peachy-pink, I thought the name would fit both.

Here's a quick recipe, using store-bought bitters, just in case you're short on time:

-The Mona Kay-
8oz. grapefruit juice, preferably fresh squeezed
½ tsp sugar
2oz. vodka
Ice

Mix the sugar and bitters in a low-ball glass, or whatever you have. Add vodka, juice, and ice. Stir. Garnish with grapefruit zest

Optional: Try a sugared rim instead of mixing the sugar into the drink. It's prettier that way.

Friday, November 9, 2012

DIY: Pumpkin Spice Syrup

pumpkin spice, homemade syrup, gift ideas,diy

I love pumpkin pie spiced anything, but with one exception: I hate pumpkin pie. I think it's the texture. Anyway, I found a nice, cheap jar of pumpkin pie spice at Trader Joe's and have been putting it in everything. I used it to flavor apple jelly, sprinkled it on cereal, and put it in my coffee. This morning, I had the thought to make pumpkin pie spiced syrup. It turned out delicious. I used it to sweeten 2 cups of coffee today and have my mind set on pumpkin pancakes tomorrow morning! I will let you know how they turn out.  For now, here's a recipe for the syrup.

pumpkin spice, homemade syrup, gift ideas, diy, 3 ingredients

Ingredients:

2-3 medium-sized pillars of piloncillo sugar
-OR-
2 cups brown sugar

1 Cup water
2 teaspoons Pumpkin Pie Spice

A clean bottle

Directions:
1. Sanitize the bottle in the dishwasher. If you don't have a dishwasher, wash the bottle with hot, soapy water and sanitize in a pot of boiling water.
2. Place the water and sugar in a small sauce pan and bring to a boil over medium heat. Stir frequently.
3. Once the sugar is completely dissolved, check the syrup's consistency. It should be thickening by now. 
4. Mix in the pumpkin pie spice and remove from heat.
5. Use a funnel to carefully fill your bottle. Enjoy!

pumpkin spice, homemade syrup, gift ideas,diy
This makes a great gift! It's easy and cheap!


Tuesday, June 19, 2012

Recipe: Everything Cookies

These are basically oatmeal cookies, but with some improvements and additions. They vary a little every time I make them, since I usually use what's on hand, so this recipe can be tweaked to your taste.

Ingredients:
2 cups all-purpose flour
1 teaspoon baking soda
1 teaspoon coarse sea salt
Dash of cinnamon
-
1 stick of unsalted butter
½ cup coconut butter
1 cup white sugar
1 cup packed brown sugar
1 teaspoon maple flavoring
½ teaspoon vanilla extract
2 large eggs
-
½ package chocolate chips
¾ cup dried fruit (raisins, cranberries, apricots, etc.)
½ cup chopped nuts
3 cups oatmeal or other rolled grain

Directions:
Preheat oven to 375°f
1. In the bowl of an electric mixer, cream butter, coconut butter, and the sugars. Add the eggs, one at a time, followed by the maple flavoring and vanilla extract.

2. In a separate bowl, whisk together the flour, baking soda, salt, and dash of cinnamon.

3. Add the dry ingredients to the creamed mixture until fully combined.

4. Add the oatmeal (rolled rye and barley are great, too!) and dried fruit, followed by the chocolate chips and nuts.

5. Make golf ball-sized balls of cookie dough and place 1 to 2 inches apart on a cookie sheet. Bake for 10 to 12 minutes. Transfer to cooling rack or plate and let cool.

Notes:
These can be dairy-free by using all coconut butter instead of regular butter, but make sure the chocolate chips are dairy-free, too!
Needless to say, if you have a nut allergy, leave out the nuts!

Sunday, May 13, 2012

DIY: Little world

I love plants, especially little ones that fit in terrariums. 

Here is a terrarium I've had for a couple years now.  
One of the funnest things about terrariums are the little surprises you get. Ferns, for instance, are very particular about the conditions they germinate in, but if your terrarium is damp enough, you might get lucky and find a little "Irish valentine" (aka a heart-shaped fern gametophyte). The fern in the terrarium pictured above was a volunteer. It's a happy little fern. I collect moss from outside to cover the soil (this keeps moisture in) and that's like getting a grab bag of little plants. I usually pull out the grass, but I've grown some adorable little shamrocks this way.

Here's an easy step-by-step on how to assemble your own little world.
What you'll need:
1. A deep glass container or fish bowl (make sure it's clean)
2. Potting soil
3. Clean gravel or decorative glass bits (buy here)
4. One or two tiny plants
5. A shovel or spoon
6. moss and decorative rocks or figurines

Step 1. Carefully pour close to an inch of gravel into the glass jar or bowl.
Step 2. Add 1 to 2 inches of potting soil and position your plant(s).
Step 3. Add more dirt to cover the roots of the plant, then water.
Step 4. Arrange moss and any decorative knick-knacks.

 Don't forget to water as needed (this depends on the types of plants you have). You might also want to keep a spray bottle handy, if you have ferns, since they prefer high humidity.

Monday, April 9, 2012

DIY: Homemade syrup

Today we are making pancake syrup! Maple syrup can be very expensive, but I've developed a really good imitation! The trick is to use piloncillo sugar. It's unrefined and gives the syrup that earthy, planty taste that most imitation maple syrups are lacking. I buy it at a local Asian/Ethnic market, and it can also be found at smaller Latin markets. If you can't find piloncillo (they look like little cones made of brown sugar), then brown sugar or raw sugar will work just fine!


What you'll need:
- 1 part water to 1 part piloncillo sugar
- Tablespoon Mapleine or Maple extract
- Some spoons, spatulas, etc.
- Sauce pot
- A small bowl
- Funnel
- Glass bottle (Old syrup bottles work well!)
- Kitchen timer


To start, let's put our little bowl in the freezer. We will use it to test the thickness of our syrup.

Now, over med-high heat, combine the water and sugar in the sauce pan. The sugar will start to dissolve pretty quickly, but stirring helps speed up the process.


Once the sugar is completely dissolved, turn the burner up to high and bring to a boil. I like to call this a "candy boil." It has a very distinct look, as seen in the above picture. The bubbles are relatively small, clear instead of frothy, and do not increase in volume.

Set the timer for 7 minutes. Stir occasionally.

After a couple minutes, take the bowl out of the freezer and spoon some syrup into it. Place back in the freezer. It should start to get thicker as it cools rapidly. When the timer goes off, take the pan off the burner and do another freezer test. If the syrup is not setting up, you need to boil it a little longer. If it doesn't need to boil longer, then set your timer for 10 minutes. This will allow for a little cool down before adding the flavoring.


It's important to not add the flavoring while the syrup is boiling. I find that most of the flavor evaporates at such high temperatures. Add the syrup when the timer goes off.


Now you can leave the syrup to cool for a little while. 15 to 30 minutes is enough time. Don't leave it too long, thought, or it will be harder to pour into the bottle. Take your funnel and carefully fill the bottle with the warm syrup. You can use your spatula to scrape down the sides.

I store mine in the fridge, but you probably don't have to as this is nothing but sugar and water.


Try it in yogurt, on pancakes and french toast, or even use it to sweeten your coffee!

Saturday, April 7, 2012

Recipe: Sweet Potato Pancakes

recipe, breakfast, food, sweet potato, pancakes

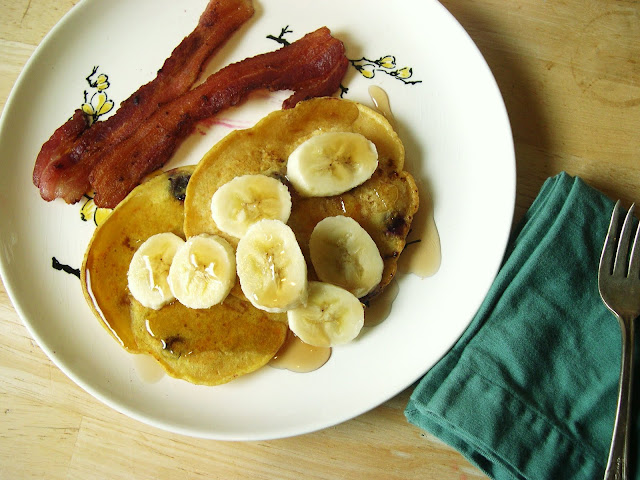
I came up with these when I was in a comfort-food-mood, but didn't just want to end up eating cake and Pringles. I had some leftover mashed sweet potatos that were looking for a home and thought I would experiment (sweet potatoes make everything better, automatically). I substituted them for the oil called for in regular pancake recipes and added extra almond milk to make the batter a bit thinner.

Health Notes: These pancakes are low-fat and dairy-free! Another plus, since sweet potatoes are naturally sweet, this recipe doesn't call for as much sugar.

recipe, breakfast, food, sweet potato, pancakes

Ingredients:
1 cup flour
1 Tbsp sugar
2 tsp baking powder
1/2 tsp salt
1 1/2 cups almond milk 
1 egg
1/2 cup mashed sweet potato
1/2 tsp vanilla extract
Coconut butter or cooking spray
Blueberries & banana, optional

1. Heat a frying pan on medium heat. In a large bowl, combine flour, sugar, baking powder, and salt.

2. In a separate bowl, whisk together egg and almond milk. Stir in sweet potato and vanilla extract.

3. Add sweet potato mixture to dry ingredients. Stir just until combined.

4. Fold in blueberries.

5. Grease the frying pan. Drop batter using a ladle or big spoon. You can make the pancakes as big or as little as you want.

6. Serve with fruit and/or syrup. Bacon doesn't hurt, either :)

Monday, April 2, 2012

Dinner Tonight: Vegetarian Puttanesca

Ingredients:
2 tsp olive oil
4 roma tomatoes, diced
1 can black olives, coarsely chopped
4-5 cloves garlic, minced or pressed
1 Tbsp Capers, rinced
1 Tbsp tomato paste
1 Tbsp balsamic vinegar
1 Tbsp parsley, chopped
Arugula or Spinach for serving
Salt and red pepper flakes, to taste
Romano cheese
Pasta, such as Fettuccine or Spaghetti

Directions:
1. Put a pot of water on to boil.

2. While the water is heating up, chop up tomatoes and olives. Mince garlic or use a garlic press.  Rinse capers. Place all these ingredients in a frying pan along with the olive oil and tomato paste. Turn heat to medium.

3. Cook pasta as directed on package.

4. Let tomato and olive mixture cook for 5 to 10 minutes, or until hot and fragrant.

5. Chop up parsley and sprinkle over mixture in frying pan. Add the vinegar, pepper flakes, and salt. 

6. Once pasts is done cooking, drain, and then toss with tomato and olive mixture.

7. Serve over greens and top with Romano cheese.


Tips and facts:
1. There are very few recipes that call for an entire can of tomato paste, so buy tomato paste in a jar, which keeps better!
2. Without the cheese this recipe is vegan!
3. I was looking up traditional puttanesca and apparently the name means "whore's style spaghetti"! How offensive! LOL
4. This dish goes great with white wine or a wine spritzer, like I made: Pour chardonnay and San Pellegrino Limonata over ice. Yum!

Monday, March 26, 2012

DIY: let's make a card!

Nothing tops a handmade card! Here is a simple design that you can personalize for any occasion. Remember, it doesn't have to be perfect! I'll walk you through the steps and you'll see it's easier than it looks :)
Materials:
(Click on them for sources)
- pencil & eraser
- Marker in a fun color
- Ruler (not pictured)

Step 1. Sketch out 3 flag poles and 2 flags. The flags should be about 1/2 inch wide. Each pole should be a different length and they should point away from each other so there's room for each flag. No need for perfection! Use your eraser if you need to!
Step 2. Add a pattern to one flag, if you want, or you can leave it blank. Then, carefully go over your pencil lines with the super fine pen. Let dry for a couple minutes.
Step 3. While the ink is drying, cut your ribbon. Start with 2 inches to leave room for mistakes. Fold the ribbon end in half and make a diagonal cut that slants away from the end. (Click here for more detailed directions)
Step 4. Color in one flag with the colored marker and write a message such as "happy birthday" or "thanks" in the other flag. I wrote "hurrah!" because I made my flag too small. A super fine pen means you can write very small, though! Now use your eraser to get rid of all the pencil lines.
Step 5. Carefully apply adhesive along half of the back of the ribbon. Don't apply it to the v-cut end, since it can make the ribbon unravel. Trim up any loose threads.
Step 6. Place the ribbon on the empty flag pole and gently press to adhere it to the paper. Lift up the unglued end and apply a little adhesive directly to the paper.

Don't forget to sign and date the back! And don't hesitate to ask if you're having trouble or don't get one of the steps.


There you go! A nice little card to give to someone you luuurrrve (that's British for "love")

Thursday, July 29, 2010

Earrings


I'm a fidgety person. Always have been. I rarely watch TV, but when I do, I need something to keep me occupied, otherwise I just get up and leave. This is even true when America's Next Top Model is on (I've been watching the re-runs). Last night, I had already finished my dinner by the time it was on, so I decided to make my friend Ashley a pair of earrings. I made her a pair for Christmas a couple years ago and she has been asking for more. I made two pairs for her to choose from.

The first pair is made from Sterling silver, dyed coral, and glass beads.

The second is shell and Sterling.

The photo of me:
J. Crew cardigan
Chico design shirt
Blogging tips