Showing posts with label paper crafts. Show all posts

Thursday, December 19, 2013

A Merry Reprise: Waxed Snowflakes


I've been making these waxed snowflakes for years, but recently they've been receiving a lot of attention! My how-to post has always been one of my most popular posts and the pins bring lots of traffic through Pinterest. 


This year, I decided to sell sets on Etsy and was thrilled when I sold 4 sets to a store in New Orleans! The shop, Storyville Apparel, hung the 60 handcut snowflakes in their window (The ones on the windows are not mine).


And guess who emailed me this week about featuring them on their site? Apartment Therapy!! Makes one feel very accomplished. And with all the snide remarks in the comment section about my snowflakes being too hard and scientifically inaccurate, I think it's safe to say I am an internet success!


If you'd like to make your own snowflakes, here's my DIY post.

If you'd like to read the nerdy comments on my feature, click here.

Cheers!

Monday, March 26, 2012

DIY: let's make a card!

Nothing tops a handmade card! Here is a simple design that you can personalize for any occasion. Remember, it doesn't have to be perfect! I'll walk you through the steps and you'll see it's easier than it looks :)
Materials:
(Click on them for sources)
- pencil & eraser
- Marker in a fun color
- Ruler (not pictured)

Step 1. Sketch out 3 flag poles and 2 flags. The flags should be about 1/2 inch wide. Each pole should be a different length and they should point away from each other so there's room for each flag. No need for perfection! Use your eraser if you need to!
Step 2. Add a pattern to one flag, if you want, or you can leave it blank. Then, carefully go over your pencil lines with the super fine pen. Let dry for a couple minutes.
Step 3. While the ink is drying, cut your ribbon. Start with 2 inches to leave room for mistakes. Fold the ribbon end in half and make a diagonal cut that slants away from the end. (Click here for more detailed directions)
Step 4. Color in one flag with the colored marker and write a message such as "happy birthday" or "thanks" in the other flag. I wrote "hurrah!" because I made my flag too small. A super fine pen means you can write very small, though! Now use your eraser to get rid of all the pencil lines.
Step 5. Carefully apply adhesive along half of the back of the ribbon. Don't apply it to the v-cut end, since it can make the ribbon unravel. Trim up any loose threads.
Step 6. Place the ribbon on the empty flag pole and gently press to adhere it to the paper. Lift up the unglued end and apply a little adhesive directly to the paper.

Don't forget to sign and date the back! And don't hesitate to ask if you're having trouble or don't get one of the steps.


There you go! A nice little card to give to someone you luuurrrve (that's British for "love")

Tuesday, February 14, 2012

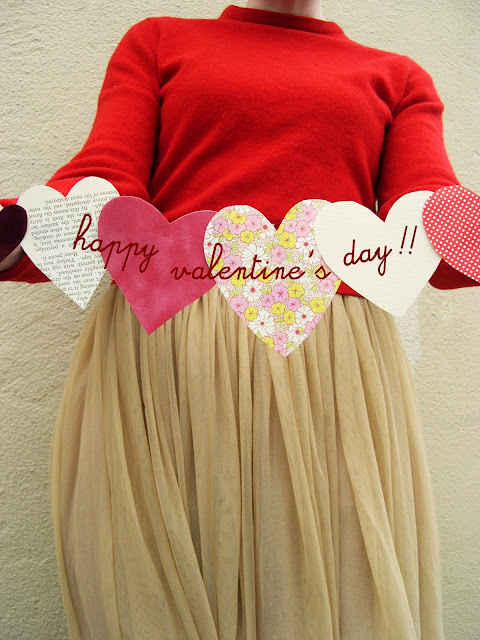
hearts & candy


Yet another holiday with the purpose of reminding us to tell our loved ones how much we appreciate them. Go buy some chocolates for someone :)


In these photos:
Thrifted Land's End sweater
H&M belt
Forever 21 skirt and shoes


Now, for a delicious recipe! It's always nice to have something special on Valentine's Day, so I came up with this Rose-Pistachio Buttermilk Biscuit recipe, based on one from the Fannie Farmer cookbook.

Rose-Pistachio Buttermilk Biscuits

Ingredients:
2 cups flour
1/2 tsp salt
2 tsp baking powder
1/2 tsp baking soda
1 Tbsp sugar
1/2 cup butter or shortening
2/3 cup buttermilk
1/4 cup chopped pistachios (if salted, they should be rinsed first)

Preheat the oven to 425F. Grease to 8-inch cake pans. Put the flour, salt, baking powder, baking soda, and sugar in a bowl. Cut in the butter using two knives, a pastry blender, or your hands until the mixture resembles coarse meal. Add the buttermilk all at once and stir just until the dough forms a ball around the utensil. Add more buttermilk if it looks to dry, but be careful not to add too much! Turn the dough onto a lightly floured surface and knead 14 times (really, that's what it says, it's not just a Valentine's Day thing). Pat or roll until 1/2 inch thick. Use a heart-shaped cookie cutter to cut out biscuits. Place about 1/8th inch apart. Bake for 10 to 12 minutes, or until lightly browned. Serve with raspberry or cherry jam and mint tea.

For the icing:
1/4 cup powdered sugar
1 Tbsp rosewater (Very affordable at Halal markets!)
Optional: Crumbled rose petals

Stir ingredients until well mixed. Drizzle over slightly cooled biscuits.


Friday, May 6, 2011

just a note


I wanted to share some of my cards with everyone. These are three of my favorite "Happy Birthday" designs.


I've been drawing for about as long as I've been playing dress up. Possibly longer! I'm not sure which pastime is my favorite.


The first two cards are hand-drawn designs and the last one has handwritten text and flourishes. I cut out the flowers with little tiny detail scissors. It was tedious! It's been one of the few cards I've reproduced en mass, and I have to cut the flowers for each card. For some reason, I can't figure out how to reproduce things in a timely fashion. Printing is expensive and doesn't always work for my designs. Oh well, it just means all my cards are one of a kind :)

Monday, April 25, 2011

Oh no.


Whoa. My foot is BAD. Going back to the doctor ASAP. My aunt suggested her friend, who is a refelxologist, but I think I may be past that point. I think I may need crutches and a brace. Yeah, that bad.

I would like to say "So I've been spending more time resting and sitting" but actually it's not that different from the usual :/ I guess I will just busy myself with some more Polyvore Sets. Such a wonderful time sucker. I am also going to make some cards, though, and fold laundry. Sooo exciting.

May I suggest checking out this blog ? It's the Blackbird Blog! Blackbird is one of my favorite boutiques in Seattle, and I know I've mentioned them at least once. Funny enough, I just noticed their latest post is thanking all the bloggers, websites, sandwich board painters, etc. who have featured their products!

Here is my latest Polyvore set! I think it's SO CUTE.

Monday, December 6, 2010

CRAFT: Waxed Paper Snowflakes

I present to you, my favorite busy-work craft: paper snowflakes!!
diy, craft, snowflakes, paper, seattle, lifestyle, holiday, fleur d'elise, recycle
I wax mine to help preserve them! This means they are stiffer, less likely to tear, and can either be taped to a window or hung in a tree.

To start, you will need the following:
1. Recycled or decorative paper. The thicker it is, the harder it is to fold, so I recommend notebook paper or equivalent weight. Catalog pages & origami paper work well!
2. Sharp, pointy scissors
3. A pencil
4. Some string or thread
5. Old candles
6. Old pan
7. Chopstick or other stick that is good for poking
8. Tin foil
9. Glitter, to taste
diy, craft, snowflakes, paper, seattle, lifestyle, holiday, fleur d'elise, recycle

Then follow these steps:
Cut a square from your paper and fold it into a triangle 3 times. The picture shows four but that's because I fold one corner over and then the next so I get a good crease. It's still just three times.


Make sure the opening is at the top and cut the top into a rounded shape.

Draw a pattern onto one side and start cutting!
diy, craft, snowflakes, paper, seattle, lifestyle, holiday, fleur d'elise, recycle

Voila!
diy, craft, snowflakes, paper, seattle, lifestyle, holiday, fleur d'elise, recycle

(Next part of project is NOT KID FRIENDLY)
I really like my snowflakes and want them to be immortal, so I dip them in wax. This is obviously where the candle wax comes in. Start by melting the wax in the old pan on low heat. My stove's settings are 1 thru 10, so I usually put it on 2 or 3. Get a sheet of tin foil ready on the counter next to the stove. When the wax is completely melted, place your snowflake in the pan and push it down with your stick or pencil. Don't use something nice because it will be covered in wax.

diy, craft, snowflakes, paper, seattle, lifestyle, holiday, fleur d'elise, recycle, waxed
When it is completely saturated, carefully take it out of the pan with your stick and gently shake it above the pan to remove excess wax. Now set it on the tin foil to cool. If it gets stuck, just carefully pry it off using your fingernails. You may need to change the tin foil from time to time.


After it is cool, I usually dip it a second time to make sure it's really well coated. At this point you can decide whether to add glitter or not. Fine glitter works best. Simply dip the snowflake like you did before, but sprinkle with glitter before it cools.


If you plan on hanging your snowflakes or tying them to gifts, you can add a bit of thread or ribbon. If taped to a window, the tape can be easily removed.
diy, craft, snowflakes, paper, seattle, lifestyle, holiday, fleur d'elise, recycle

diy, craft, snowflakes, paper, seattle, lifestyle, holiday, fleur d'elise, recycle

Happy Holidays!
Blogging tips